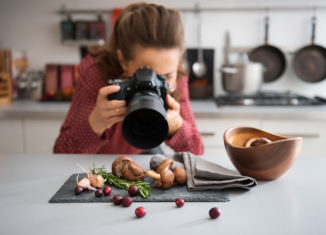
For a blog of any kind, you need photos to make an impact. And when you’re a food blogger, these pictures become doubly important simply because people want to see what the food looks like. Your description of the aromatic flavours of a particular dish will appeal to your audience better, if you can back it up with some visual evidence.
Pictures need editing, but there are certain ways in which pictures for food blogs differ from those of your ordinary blogs. Here are some top tips you can follow to bring in the right photo effects for your food blog:
1. Colour and Contras
This is one of the primary things you will have to keep in mind while working with your food photo. Raw files sometimes show a faded version of the colour of your dish. Fret not, you can adjust it on your editing table. Increase or lower the colour contrast on the picture to make the actual dish pop like no other.
2. Warmth and coldness
Now, this depends on the topic you’ve chosen for your food post. Suppose you are clicking pictures for a post on the best fruits and vegetables for the winter, then you could edit the picture you want to use to have a colder effect. This can be done by amping up the bluish hues on the colour bar of your food photography editing app.
If your post is about hearty family meals, then a certain degree of warmth would be welcome in your shot. For this, simply amp up the reds and oranges in your shot.
3. Set the white balance correctly
If you are not working with raw files, then make sure that the white balance of your phone is set correctly. This will prevent your picture to be overpowered by one single shade. However, shooting in RAW format is recommended, since it will make it easier for you to edit the pictures and the white balance later.

4. Adjust the sharpness
For your pictures to make an impact, they need to be sharp. Sharper lines around the edges of your dish will enable it to stand out from the background. Adjusting the sharpness is also recommended if you feel that the main element of your dish is fading into the background, or the picture itself is slightly blurry.
5. Crop with caution
It’s okay to crop your picture if there are elements in the background that you don’t want in your picture. But sometimes these rogue elements actually add an aesthetic value to your picture. Take a good look at the file before settling on whether or not you want these background elements in your final shot.
6. Focus and defocus
You will have to focus on the food part of your dish more than the other elements, but remember not to overdo it. Blurring out everything in the background makes the picture look highly unnatural. Don’t zoom in too much either- the viewer might not be able to see the dish or understand it at all.
The newspapers and other photography sources include some outstanding narrative photos. These photographs record and preserve events in human history for everybody to see, from a freshly proclaimed sports champion’s ecstatic yell to a demonstrator facing a gun in the slaughter.
Additionally, by layering elements in your picture using layer photos apps you can partially solve one of photography’s most significant drawbacks: its dual nature.
