Bisquick is a pantry staple, but it’s very simple to make on your own! This recipe is ideal for the mornings, and makes breakfast and brunch so much easier!

We all want the same things in life: love, stability, joy, and waffles on weekends. On both fronts, Having an all-purpose baking mix on hand is a good idea in general, but especially for that last one.
All-purpose baking mix, better known by the brand name that made it a household staple, is essentially a flour mixture with leavening agents, sugar, salt, and fat built-in—getting you more than halfway to a variety of cooking and baking endeavors. Eggs, milk and sometimes oil are all you need to stir into such a mixture. While a ready-to-prepare store staple like Bisquick is easy, a homemade bisquick recipe has the same benefits, plus a lot more.
The quality of the foods you prepare with your DIY Bisquick is a significant selling point for me. Because they are handcrafted.
Cakes, waffles, bread, and all other items you cook will taste authentically homemade. By doing some of your measurements and mixing ahead, you are simply saving time in the long run.
Bisquick Prepared from Scratch
This homemade all-purpose baking mix is very simple to create and makes weekend breakfasts possible any day of the week. But pancakes are not the only item you can make with this mix; check out our tutorial, How to Make Your Bisquick—Plus, All the Ways to Use It, for more ideas and tips. Because this homemade version lacks the shelf stabilizers added in store-bought baking mixes, you will want to keep it refrigerated to extend its shelf life.
What You Will Need
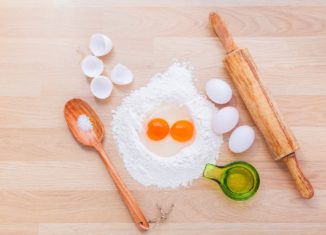
¾ cup cornstarch, 5 ½ cups flour which is also known as all-purpose flour, 3 tablespoons baking powder, 1 tablespoon table salt, 2 tablespoons granulated sugar, 1 cup chilled unsalted butter or vegetable shortening.
Short Version of the Bisquick Making Procedure
- Whisk together the flour, baking powder, cornstarch, sugar, and salt in a large mixing bowl. It is important to thoroughly whisk this mixture to aerate the components and ensure that all ingredients are uniformly distributed.
- Cut the cooled shortening or butter into the dry ingredients with a pastry blender, food processor, or your finger until the texture is smooth.
- Refrigerate the mixture for up to three months in airtight, covered containers. And you may use it in place of Bisquick in any recipe that requires an all-purpose baking mix.
Extended Version of the Recipe
We have only gone over the short and simple recipe for making Bisquick at home; but, if you have more time, you can follow the extended version too.
Tip to Make the Bisquick Crispy and Fluffy
We add a comment here regarding the corn starch because if you search the internet for DIY Bisquick recipes, you will see that the vast majority of the item does not call for it. If you look at the ingredients label on a box of Bisquick, however, you will notice that it is listed as the second item—there is a reason for that.
Cornstarch is often referred to as the “hidden ingredient” for the fluffiest, crispy biscuits and waffles, so incorporating the silky powder in a baking mix to make these dishes, as well as other foods that benefit from crispy and fluffy edges, makes sense. The point is that corn starch is not just thrown in to make our recipe seem a little different; it has a purpose.
Storage Procedure of the Batter
After thoroughly combining the dry ingredients, cut in one cup of cold shortening or unsalted butter. You can use all shortening, or all butter, or a half and half-shortening and butter combination. If a product like Earth Balance Vegan baking sticks makes more sense for your diet, you can go for that one too. To “slice” the fat into the dry ingredients, use a food processor, your hands, or a pastry blender, and distribute the fat as evenly as possible throughout the dry mixture. You will want to incorporate the cold fat into the mixture until it resembles a bowl of fine beach sand.
That’s all there is to it; your all-purpose baking mix is made. Refrigerate it for up to three months in closed, airtight containers (a piece of masking tape labelled with the date it was made will also be helpful for this recipe).
You can use your homemade blend instead of Bisquick or all-purpose baking mix in any recipe that asks for this mix.
So, if you have already memorized the pancake recipe on the back of your quick recipes box, keep using it, or take a look at our recipe if you are looking for some ideas.
Tips for Saving Some More Time
The first thing to do with the homemade baking mix is to make a variation with the batter. Here is what you will need for some of the more common baking mix applications. This bisquick recipe can easily be doubled or tripled. Simply place it in an airtight jar in the refrigerator.
It is convenient to have it on hand and to be able to grab it whenever you require it. Just make sure to keep the mixture refrigerated. You will appreciate having this on hand. This is especially useful during baking seasons like Fall and the holidays when you do a lot of baking. Making a batch saves huge time.
Final Thoughts
Making this at home is quite simple, and the savings quickly pile up. Bisquick can be expensive, but it is not difficult to make at home, and also saves some money. Once you start making this and other stuff, you will be hooked.
